참고
Column, Row
- Column
- 위젯을 위/아래로 쌓을 때는 Column 을 사용합니다.
- Column 역시 위젯입니다.
- Column 은 기본적으로 위에 붙어 있는 상태로 생성됩니다.
- Column 을 가운데로 배치하기 위해서 Center 위젯으로 감싸려는 경우가 있는데 Center 위젯으로 감싸도 가운데에 위치하지는 않습니다.
- Column 을 가운데로 배치하기 위해서는 Column 위젯 내의
mainAxisAlignment에MainAxisAlignment.center를 부여합니다. 아래에서 설명합니다.
- Row
-
위젯을 좌/우로 펼칠때 Row 를 사용합니다.
-
Row 를 가운데에 위치시키기 위해서는 Container 로 감싼 후에 Container 의
height : double.infinity로 주면 됩니다. Row 는 자기 자신이 위치한 곳의 정중앙에 위치하려고 하는 속성이 있기 때문입니다.
-
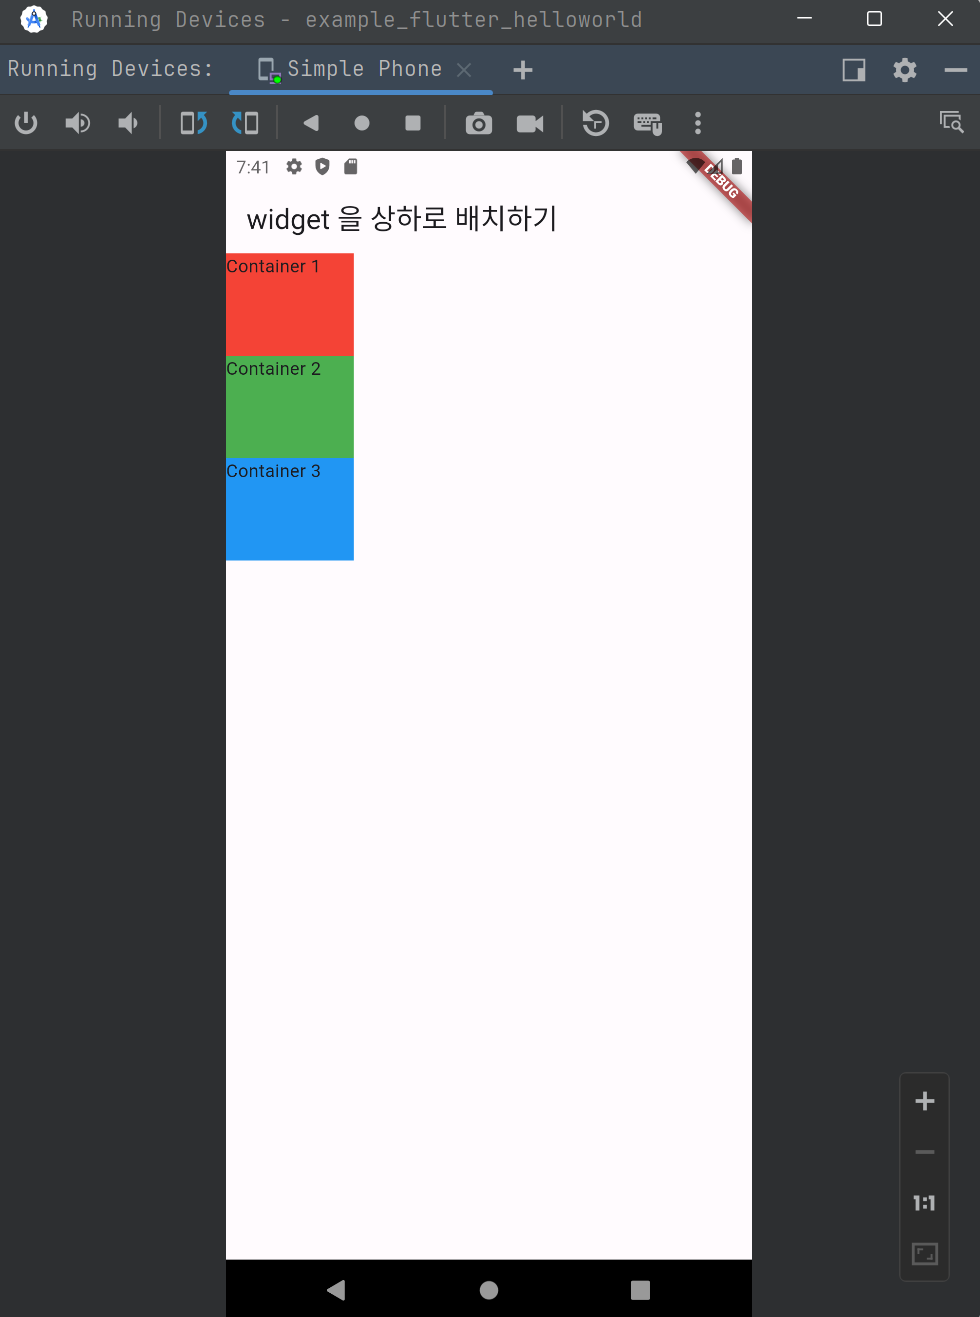
Column 으로 위젯을 상하로 쌓아보기
아래 예제에서는 Body 컴포넌트를 StatelessWidget 으로 구성했으며, 내부의 배치를 Column 으로 배치되게끔 했습니다.
lib/layout_example1.dart
import 'package:flutter/material.dart';

void main() {
  runApp(MaterialApp(
    home: Scaffold(
        appBar: AppBar(
          title: Text('widget 을 상하로 배치하기'),
        ),
        body: Body()),
  ));
}

class Body extends StatelessWidget {
  const Body({super.key});

  @override
  Widget build(BuildContext context) {
    // 위젯을 위/아래로 쌓을 때는 Column 이라는 위젯을 사용
    return Column(
      // (1)
      children: [
        Container(
          width: 100,
          height: 80,
          child: Text('Container 1'),
          color: Colors.red,
        ),
        Container(
          width: 100,
          height: 80,
          child: Text('Container 2'),
          color: Colors.green,
        ),
        Container(
          width: 100,
          height: 80,
          child: Text('Container 3'),
          color: Colors.blue,
        ),
      ],
    );
  }
}- (1) : children 에 컨테이너 위젯들을 여러개 두었습니다.
이 코드의 결과는 아래와 같습니다.
참고 : child 필드를 가장 뒤로 배치
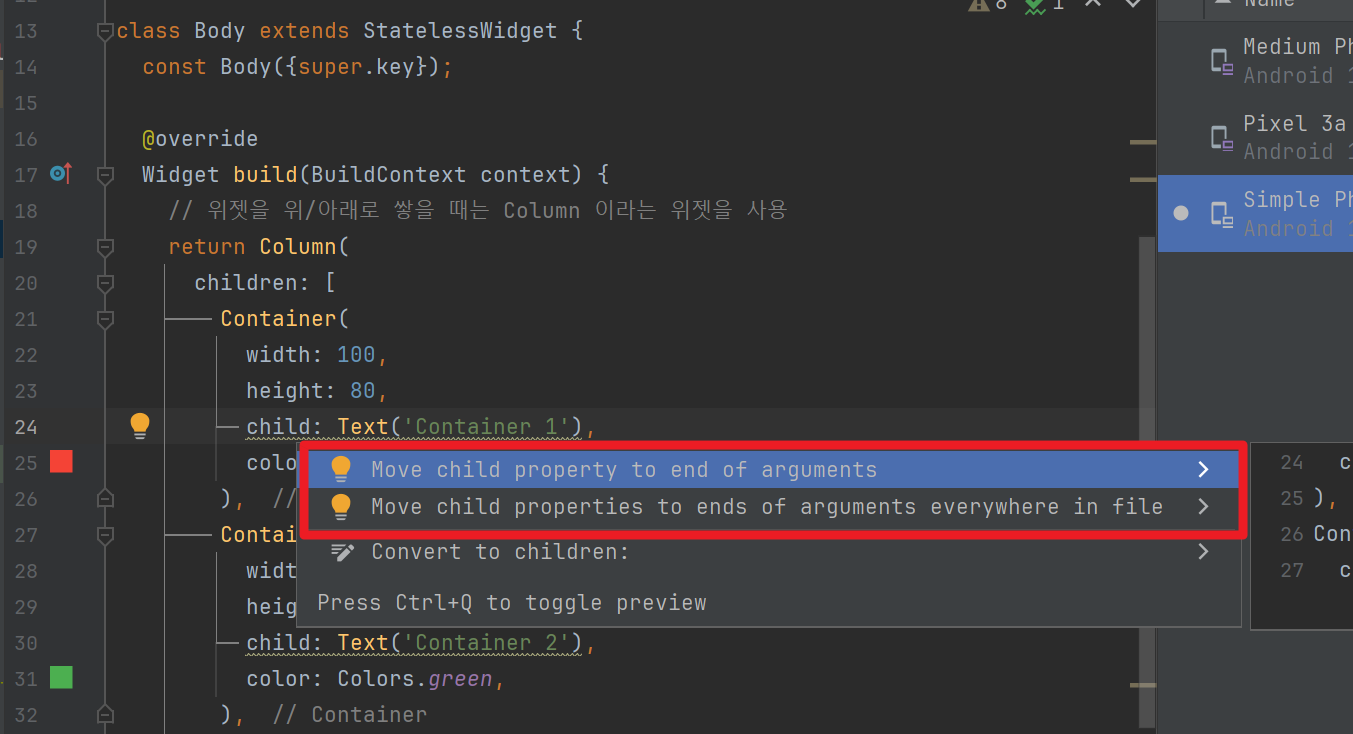
- Move child property to end of arguments
- 현재 선택한 필드 내의 child 프로퍼티를 가장 뒤로 옮깁니다.
- Move child properties to ends of arguments everywhere in file
- 뒤에 따라오는 다른 Container 들에도 똑같이 child 프로퍼티가 뒤에 위치하도록 해줍니다.
Column 을 Container 로 감싸기 (1)
Column 은 위젯입니다. Container 라는 위젯으로 감싸는 것 역시 가능합니다.
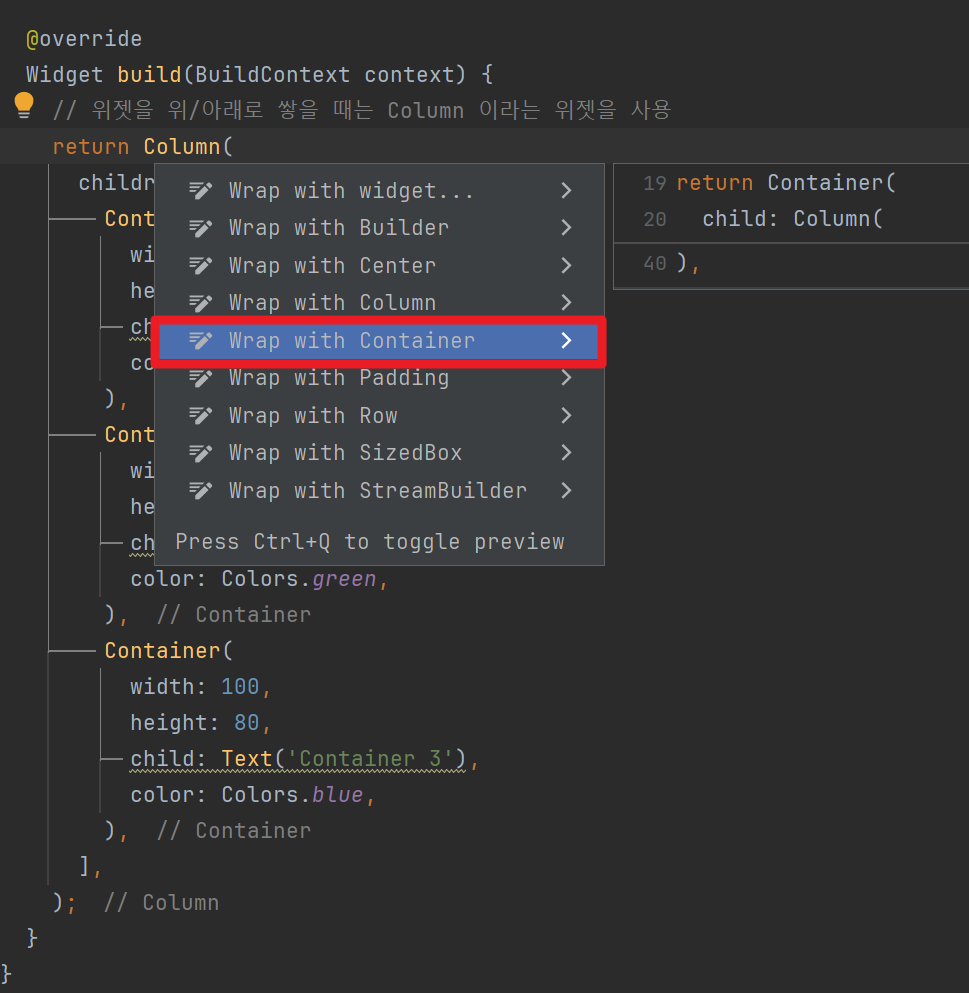
그리고 아래의 코드를 작성해주세요.
lib/layout_example.dart
import 'package:flutter/material.dart';

void main() {
  runApp(MaterialApp(
    home: Scaffold(
        appBar: AppBar(
          title: Text('widget 을 상하로 배치하기'),
        ),
        body: Body()),
  ));
}

class Body extends StatelessWidget {
  const Body({super.key});

  @override
  Widget build(BuildContext context) {
    // 위젯을 위/아래로 쌓을 때는 Column 이라는 위젯을 사용
    return Container(
      height: double.infinity, // (1)
      width: double.infinity,  // (1)
      color: Colors.amber,  // (2)
      child: Column(
        children: [
          Container(
            width: 100,
            height: 80,
            child: Text('Container 1'),
            color: Colors.red,
          ),
          Container(
            width: 100,
            height: 80,
            child: Text('Container 2'),
            color: Colors.green,
          ),
          Container(
            width: 100,
            height: 80,
            child: Text('Container 3'),
            color: Colors.blue,
          ),
        ],
      ),
    );
  }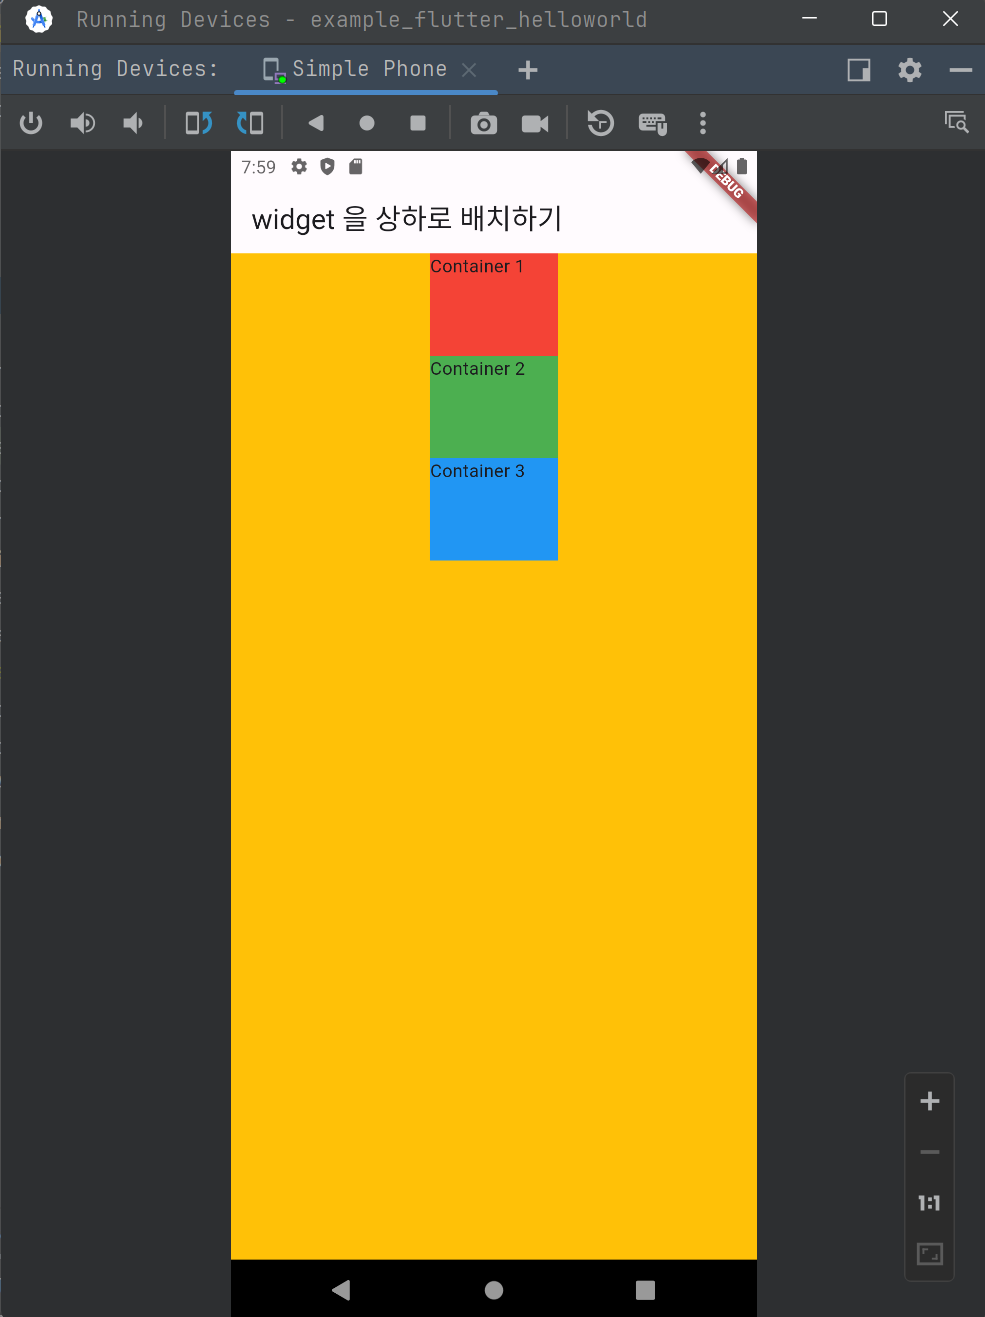
}- (1) : width, height 를 꽉 차게 지정해줬습니다.
- (2) : Container 의 색을 Colors.amber 로 지정해줬습니다.
위 코드의 결과는 아래와 같습니다.
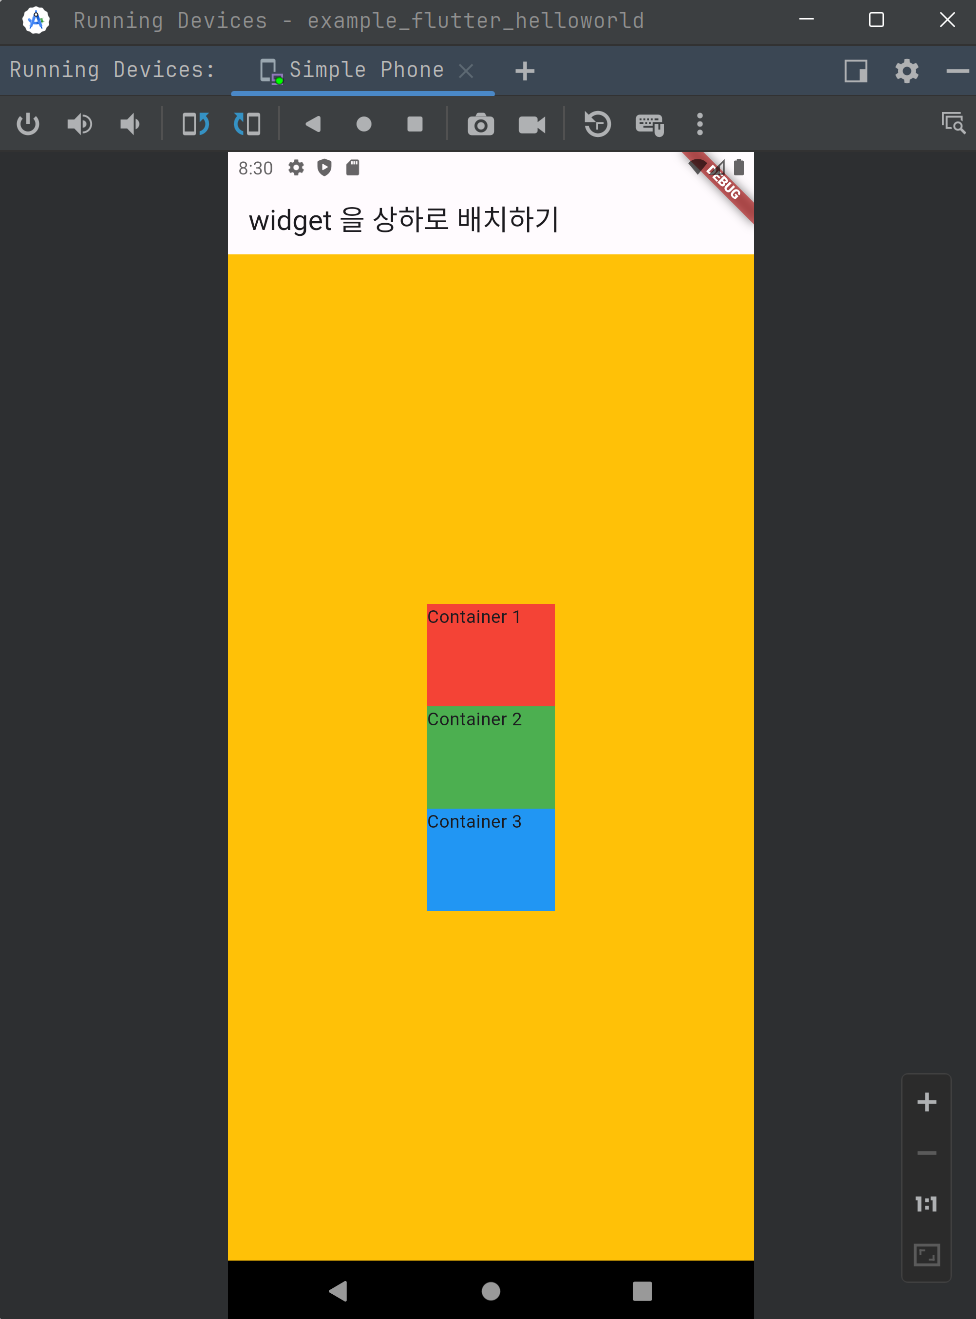
Column 을 가운데로 옮겨보기
Column 을 가운데로 배치하기 위해서는 Column 위젯 내의 mainAxisAlignment 에 MainAxisAlignment.center 를 부여합니다.
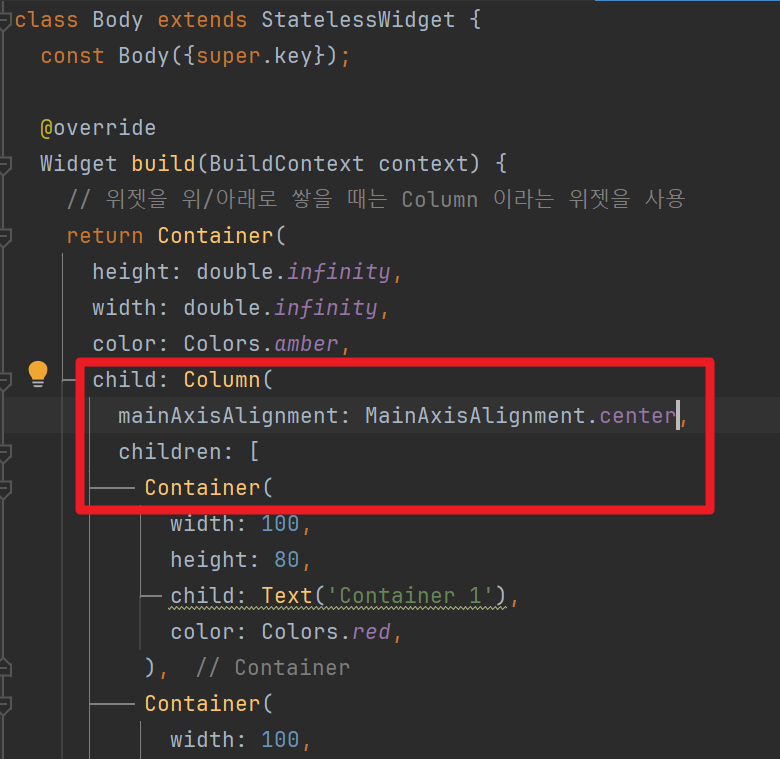
아래 코드를 작성해봅니다.
lib/layout_example3.dart
import 'package:flutter/material.dart';

void main() {
  runApp(MaterialApp(
    home: Scaffold(
        appBar: AppBar(
          title: Text('widget 을 상하로 배치하기'),
        ),
        body: Body()),
  ));
}

class Body extends StatelessWidget {
  const Body({super.key});

  @override
  Widget build(BuildContext context) {
    // 위젯을 위/아래로 쌓을 때는 Column 이라는 위젯을 사용
    return Container(
      height: double.infinity,
      width: double.infinity,
      color: Colors.amber,
      child: Column(
        // (1)
        mainAxisAlignment: MainAxisAlignment.center,
        children: [
          Container(
            width: 100,
            height: 80,
            child: Text('Container 1'),
            color: Colors.red,
          ),
          Container(
            width: 100,
            height: 80,
            child: Text('Container 2'),
            color: Colors.green,
          ),
          Container(
            width: 100,
            height: 80,
            child: Text('Container 3'),
            color: Colors.blue,
          ),
        ],
      ),
    );
  }
}
(1)
- Column 을 가운데로 배치하기 위해서는 Column 위젯 내의
mainAxisAlignment에MainAxisAlignment.center를 부여했습니다.
위 코드의 출력결과는 아래와 같습니다.
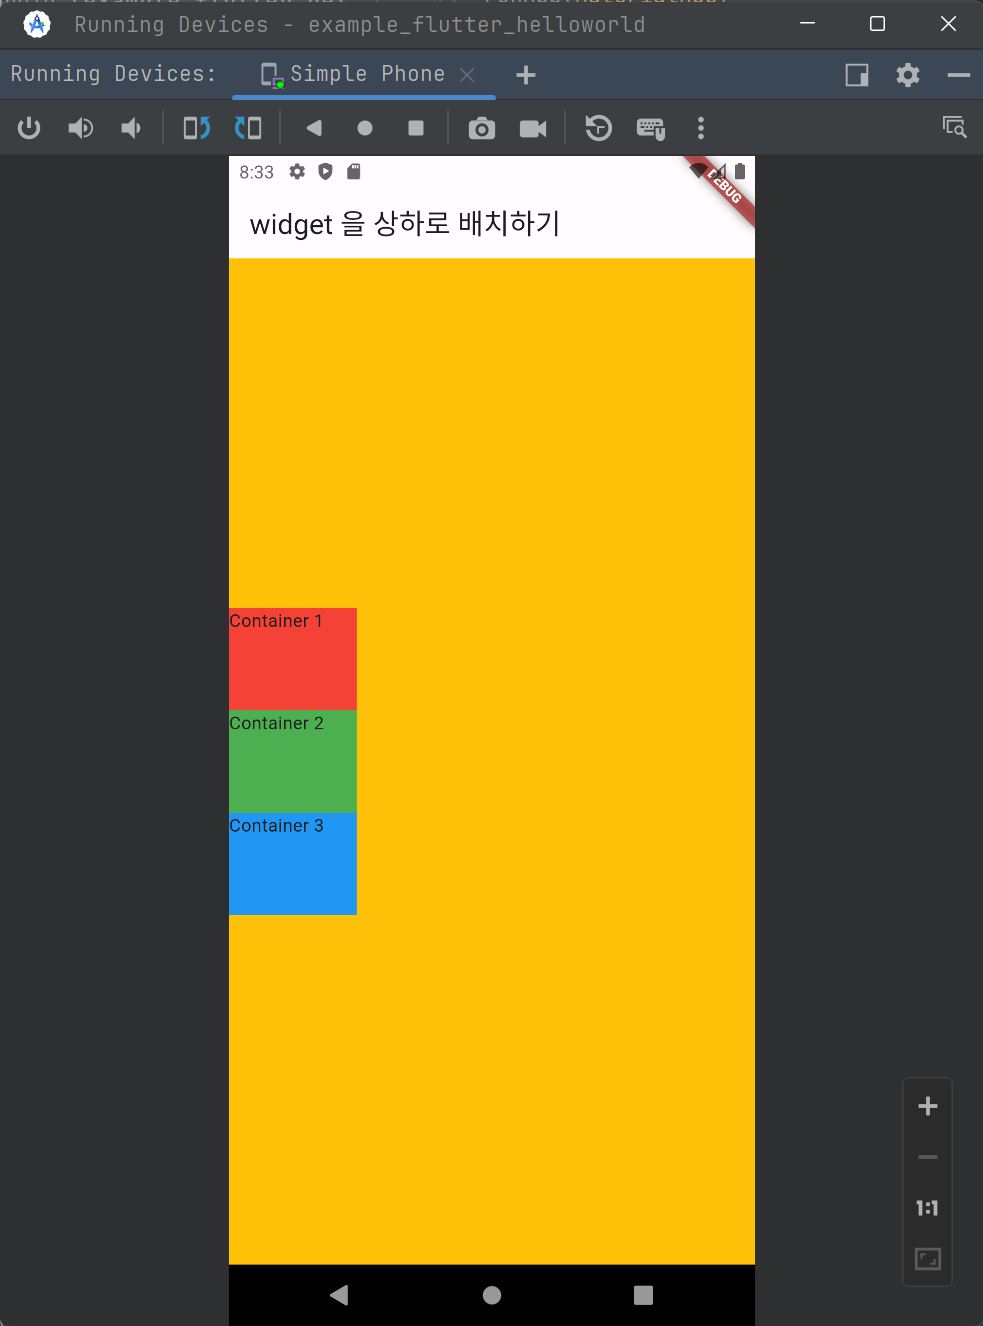
Column 을 왼쪽으로 붙이기
이번에는 Column 의 사이즈를 작게해서 세로 사이즈가 작은 Column 을 구성하고, 이 Column 을 왼쪽에 붙여봅니다.
코드는 아래와 같습니다.
lib/layout_example4.dart
import 'package:flutter/material.dart';

void main() {
  runApp(MaterialApp(
    home: Scaffold(
        appBar: AppBar(
          title: Text('widget 을 상하로 배치하기'),
        ),
        body: Body()),
  ));
}

class Body extends StatelessWidget {
  const Body({super.key});

  @override
  Widget build(BuildContext context) {
    // 위젯을 위/아래로 쌓을 때는 Column 이라는 위젯을 사용
    return Container(
      height: double.infinity,
      width: double.infinity,
      color: Colors.amber,
      child: Column(
        mainAxisAlignment: MainAxisAlignment.center,
        // (1)
        crossAxisAlignment: CrossAxisAlignment.start,
        children: [
          Container(
            width: 100,
            height: 80,
            child: Text('Container 1'),
            color: Colors.red,
          ),
          Container(
            width: 100,
            height: 80,
            child: Text('Container 2'),
            color: Colors.green,
          ),
          Container(
            width: 100,
            height: 80,
            child: Text('Container 3'),
            color: Colors.blue,
          ),
        ],
      ),
    );
  }
}
(1)
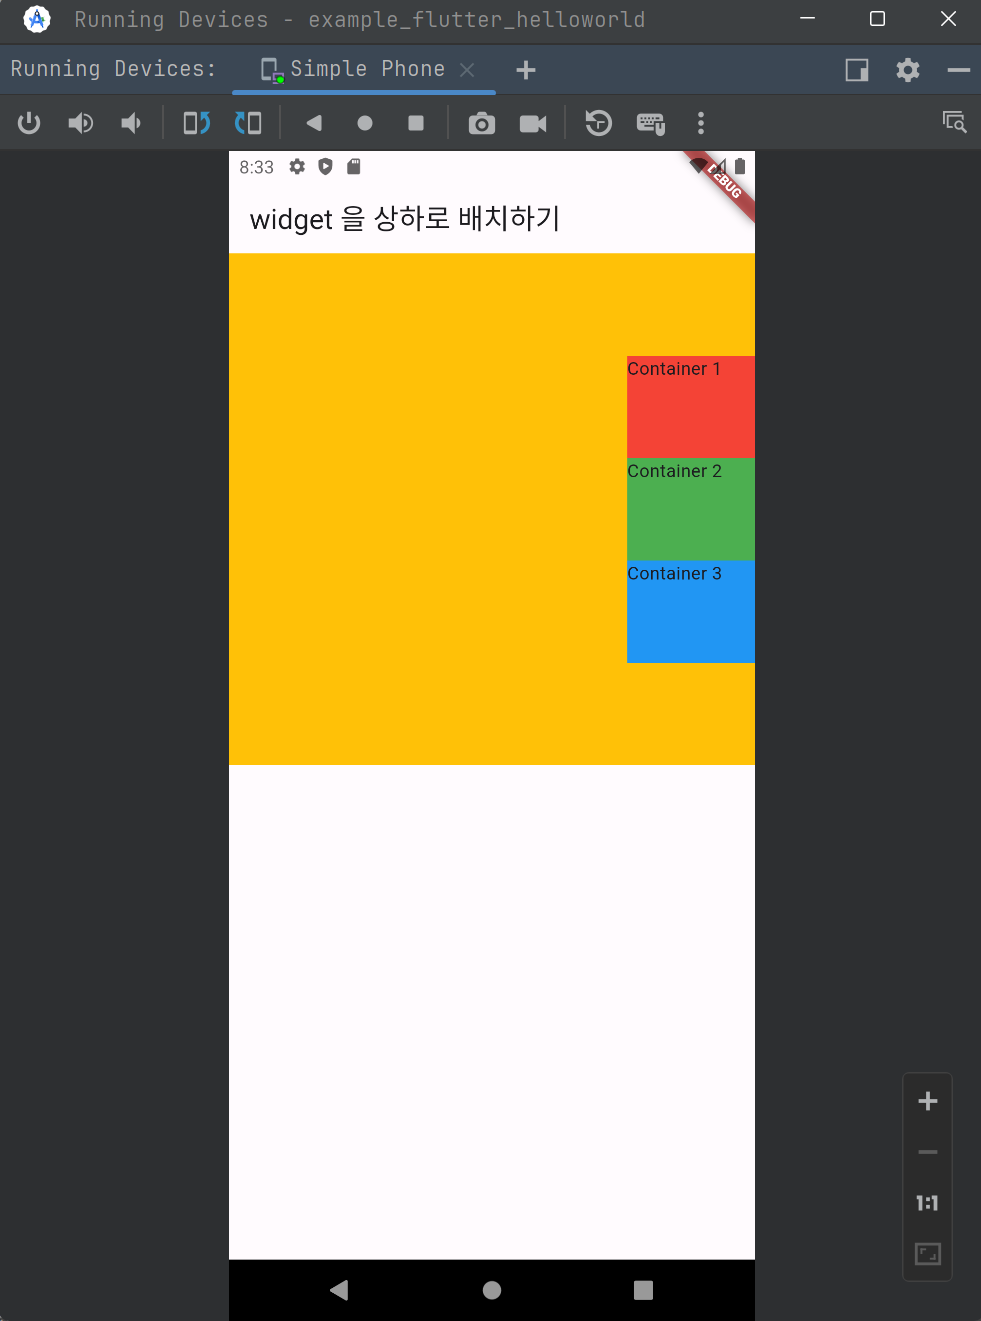
crossAxisAlignment: CrossAxisAlignment.start을 추가해서 왼쪽 끝으로 붙게해줬습니다.
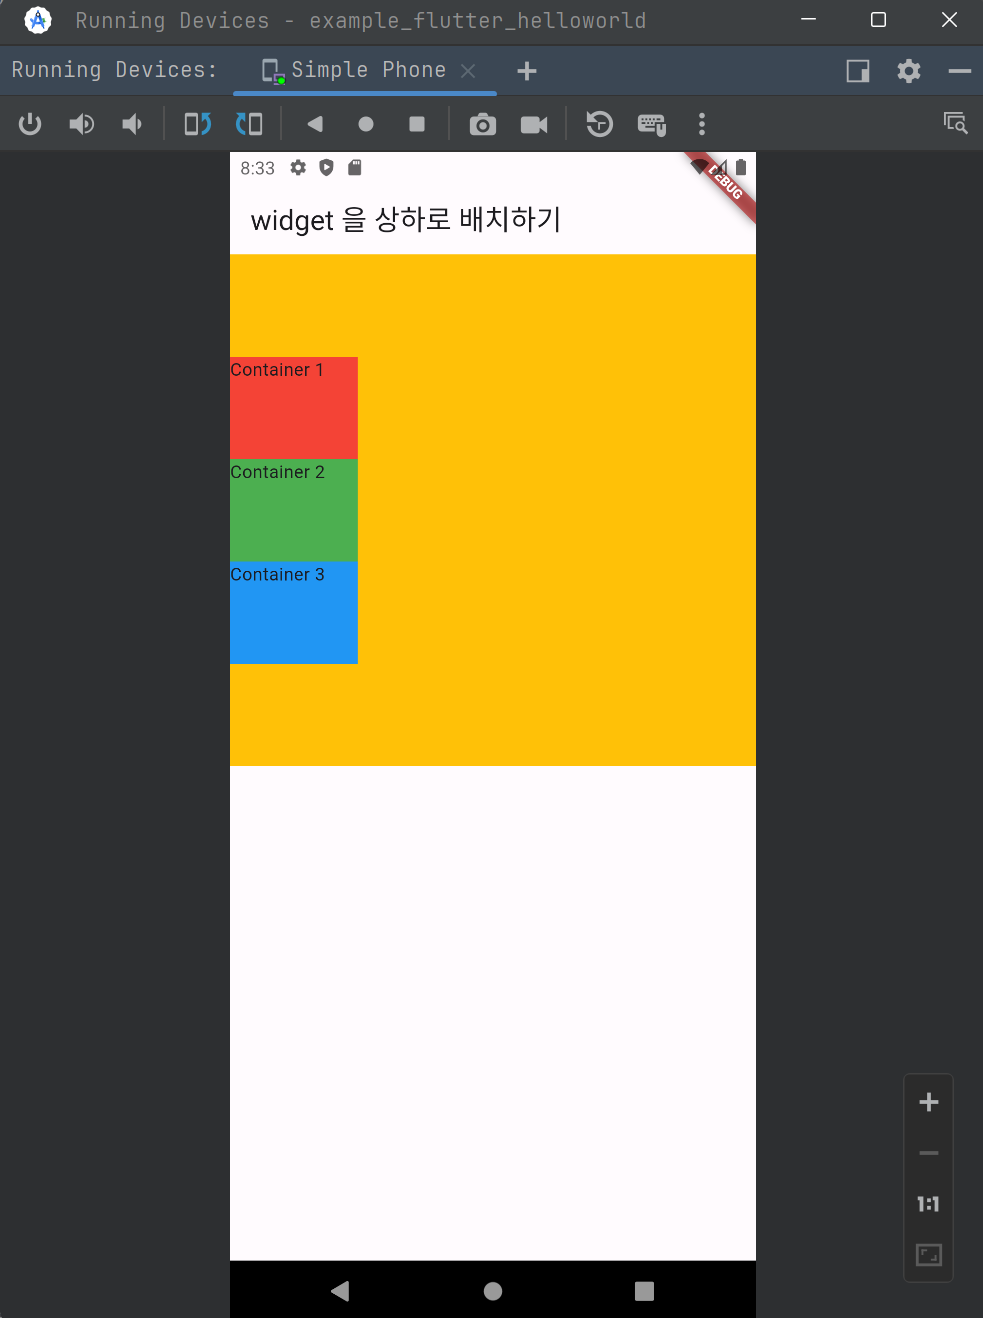
Column 사이즈를 작게 만들어보기
이번에는 Column 의 사이즈를 작게해서 세로 사이즈가 작은 Column 을 구성하고, 이 Column 을 왼쪽에 붙여봅니다.
import 'package:flutter/material.dart';
void main() {
runApp(MaterialApp(
home: Scaffold(
appBar: AppBar(
title: Text('widget 을 상하로 배치하기'),
),
body: Body()),
));
}
class Body extends StatelessWidget {
const Body({super.key});
@override
Widget build(BuildContext context) {
// 위젯을 위/아래로 쌓을 때는 Column 이라는 위젯을 사용
return Container(
// (1)
height: 400,
width: double.infinity,
color: Colors.amber,
child: Column(
mainAxisAlignment: MainAxisAlignment.center,
crossAxisAlignment: CrossAxisAlignment.start,
children: [
Container(
width: 100,
height: 80,
child: Text('Container 1'),
color: Colors.red,
),
Container(
width: 100,
height: 80,
child: Text('Container 2'),
color: Colors.green,
),
Container(
width: 100,
height: 80,
child: Text('Container 3'),
color: Colors.blue,
),
],
),
);
}
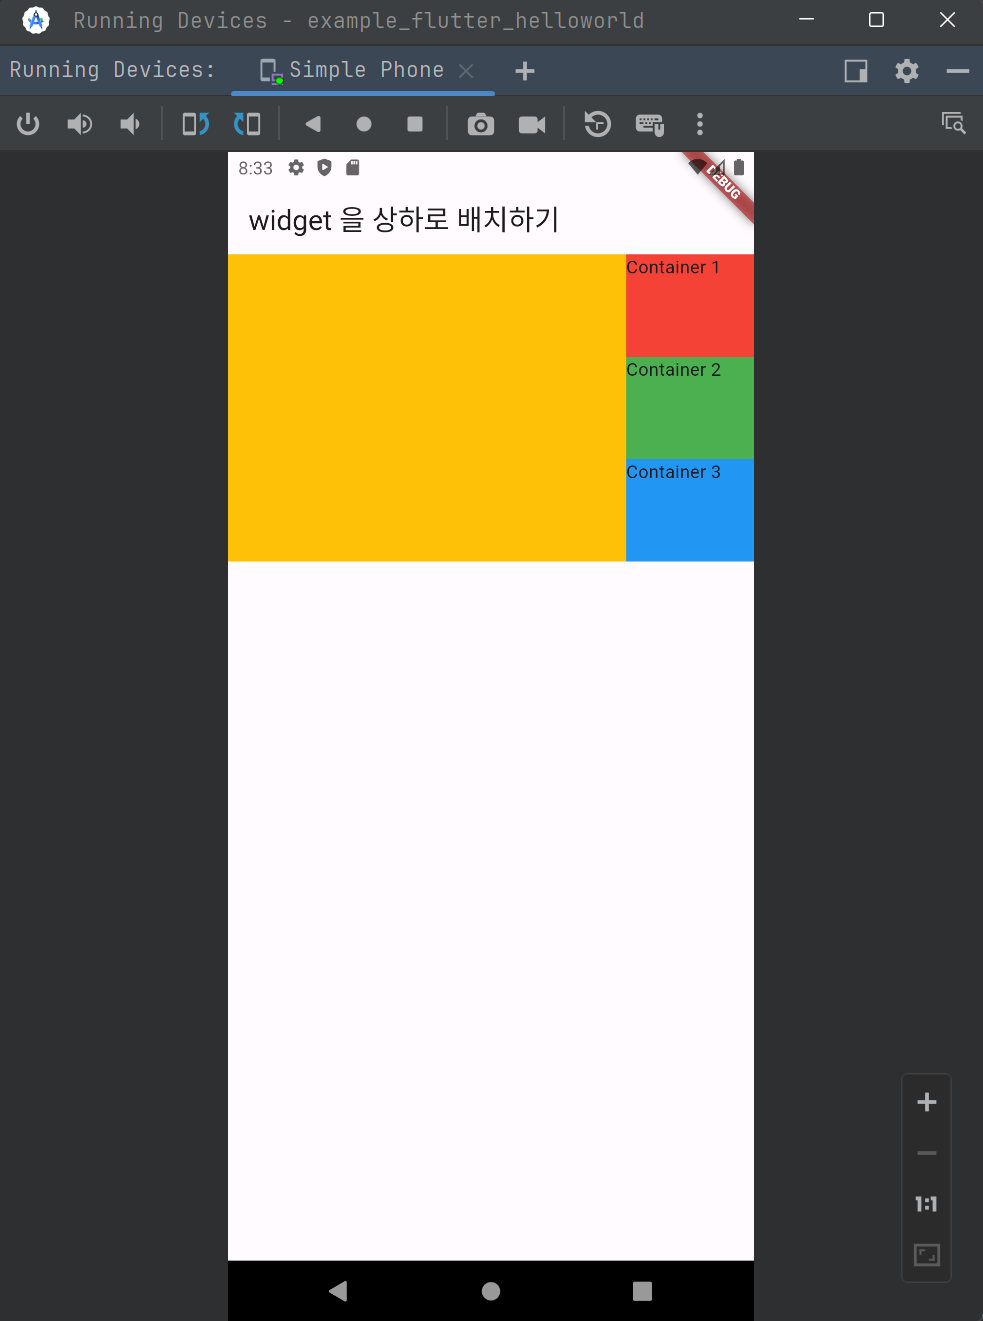
}(1)
- Container 의 height 를 400 으로 지정해줍니다.
출력결과는 아래와 같습니다.
만약 오른쪽 끝으로 붙이려면 CrossAxisAlignment.end 를 사용합니다.
import 'package:flutter/material.dart';

void main() {
  runApp(MaterialApp(
    home: Scaffold(
        appBar: AppBar(
          title: Text('widget 을 상하로 배치하기'),
        ),
        body: Body()),
  ));
}

class Body extends StatelessWidget {
  const Body({super.key});

  @override
  Widget build(BuildContext context) {
    // 위젯을 위/아래로 쌓을 때는 Column 이라는 위젯을 사용
    return Container(
      height: 400,
      width: double.infinity,
      color: Colors.amber,
      child: Column(
        mainAxisAlignment: MainAxisAlignment.center,
        crossAxisAlignment: CrossAxisAlignment.end,
        children: [
          Container(
            width: 100,
            height: 80,
            child: Text('Container 1'),
            color: Colors.red,
          ),
          Container(
            width: 100,
            height: 80,
            child: Text('Container 2'),
            color: Colors.green,
          ),
          Container(
            width: 100,
            height: 80,
            child: Text('Container 3'),
            color: Colors.blue,
          ),
        ],
      ),
    );
  }
}
출력결과는 아래와 같습니다.
만약 컬럼의 사이즈를 3개의 컨테이너를 쌓아둔 폭 만큼으로 제한하고 싶다면 minAxisSize : MainAxisSize.min 을 부여해줍니다.
코드는 아래와 같습니다.
출력결과는 아래와 같습니다.
Row : 좌우 배치
import 'package:flutter/material.dart';

void main() {
  runApp(MaterialApp(
    home: Scaffold(
        appBar: AppBar(
          title: Text('widget 을 상하로 배치하기'),
        ),
        body: Body()),
  ));
}

class Body extends StatelessWidget {
  const Body({super.key});

  @override
  Widget build(BuildContext context) {
    // 위젯을 위/아래로 쌓을 때는 Column 이라는 위젯을 사용
    return Container(
      width: double.infinity,
      color: Colors.amber,
      // (1)
      child: Row(
        children: [
          Container(
            width: 100,
            height: 80,
            child: Text('Container 1'),
            color: Colors.red,
          ),
          Container(
            width: 100,
            height: 80,
            child: Text('Container 2'),
            color: Colors.green,
          ),
          Container(
            width: 100,
            height: 80,
            child: Text('Container 3'),
            color: Colors.blue,
          ),
        ],
      ),
    );
  }
}
(1)
- Column 으로 사용하던 컴포넌트를 Row 로 바꿔줌
위 코드의 결과는 아래와 같습니다.

import 'package:flutter/material.dart';
void main() {
runApp(MaterialApp(
home: Scaffold(
appBar: AppBar(
title: Text('widget 을 상하로 배치하기'),
),
body: Body()),
));
}
class Body extends StatelessWidget {
const Body({super.key});
@override
Widget build(BuildContext context) {
// 위젯을 위/아래로 쌓을 때는 Column 이라는 위젯을 사용
return Container(
width: double.infinity,
color: Colors.amber,
child: Row(
mainAxisAlignment: MainAxisAlignment.center,
children: [
Container(
width: 100,
height: 80,
child: Text('Container 1'),
color: Colors.red,
),
Container(
width: 100,
height: 80,
child: Text('Container 2'),
color: Colors.green,
),
Container(
width: 100,
height: 80,
child: Text('Container 3'),
color: Colors.blue,
),
],
),
);
}
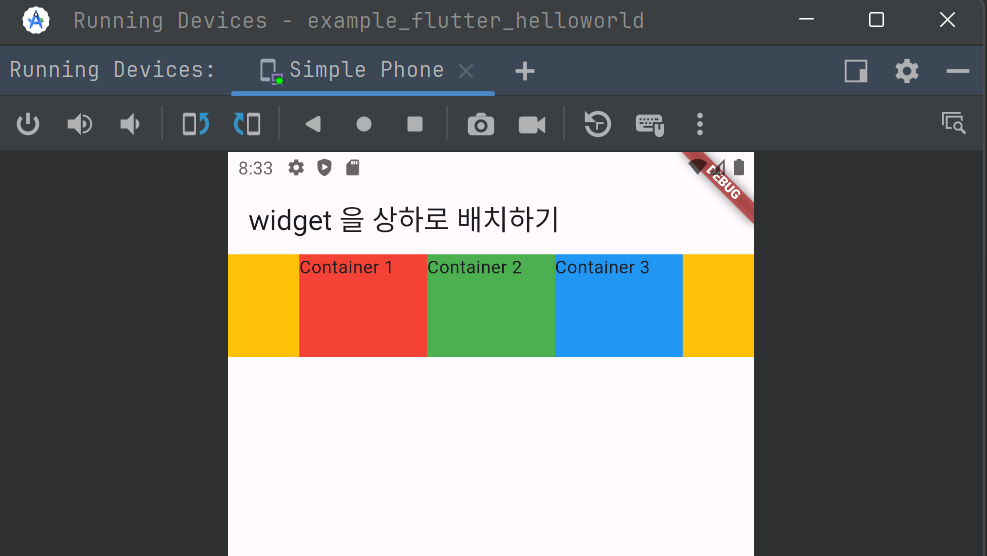
}위의 코드에서처럼
mainAxisAlignment: MainAxisAlignment.center, 을 주면 아래와 같이 가운데로 배치됩니다.
아래 코드 처럼
crossAxisAlignment: CrossAxisAlignment.center, 을 주면 세로 위치 상으로 가운데에 위치할 것 같지만 그렇지 않습니다.
import 'package:flutter/material.dart';

void main() {
  runApp(MaterialApp(
    home: Scaffold(
        appBar: AppBar(
          title: Text('widget 을 상하로 배치하기'),
        ),
        body: Body()),
  ));
}

class Body extends StatelessWidget {
  const Body({super.key});

  @override
  Widget build(BuildContext context) {
    // 위젯을 위/아래로 쌓을 때는 Column 이라는 위젯을 사용
    return Container(
      width: double.infinity,
      color: Colors.amber,
      child: Row(
        mainAxisAlignment: MainAxisAlignment.center,
        crossAxisAlignment: CrossAxisAlignment.center,
        children: [
          Container(
            width: 100,
            height: 80,
            child: Text('Container 1'),
            color: Colors.red,
          ),
          Container(
            width: 100,
            height: 80,
            child: Text('Container 2'),
            color: Colors.green,
          ),
          Container(
            width: 100,
            height: 80,
            child: Text('Container 3'),
            color: Colors.blue,
          ),
        ],
      ),
    );
  }
}
위 코드의 출력 결과는 아래와 같습니다.
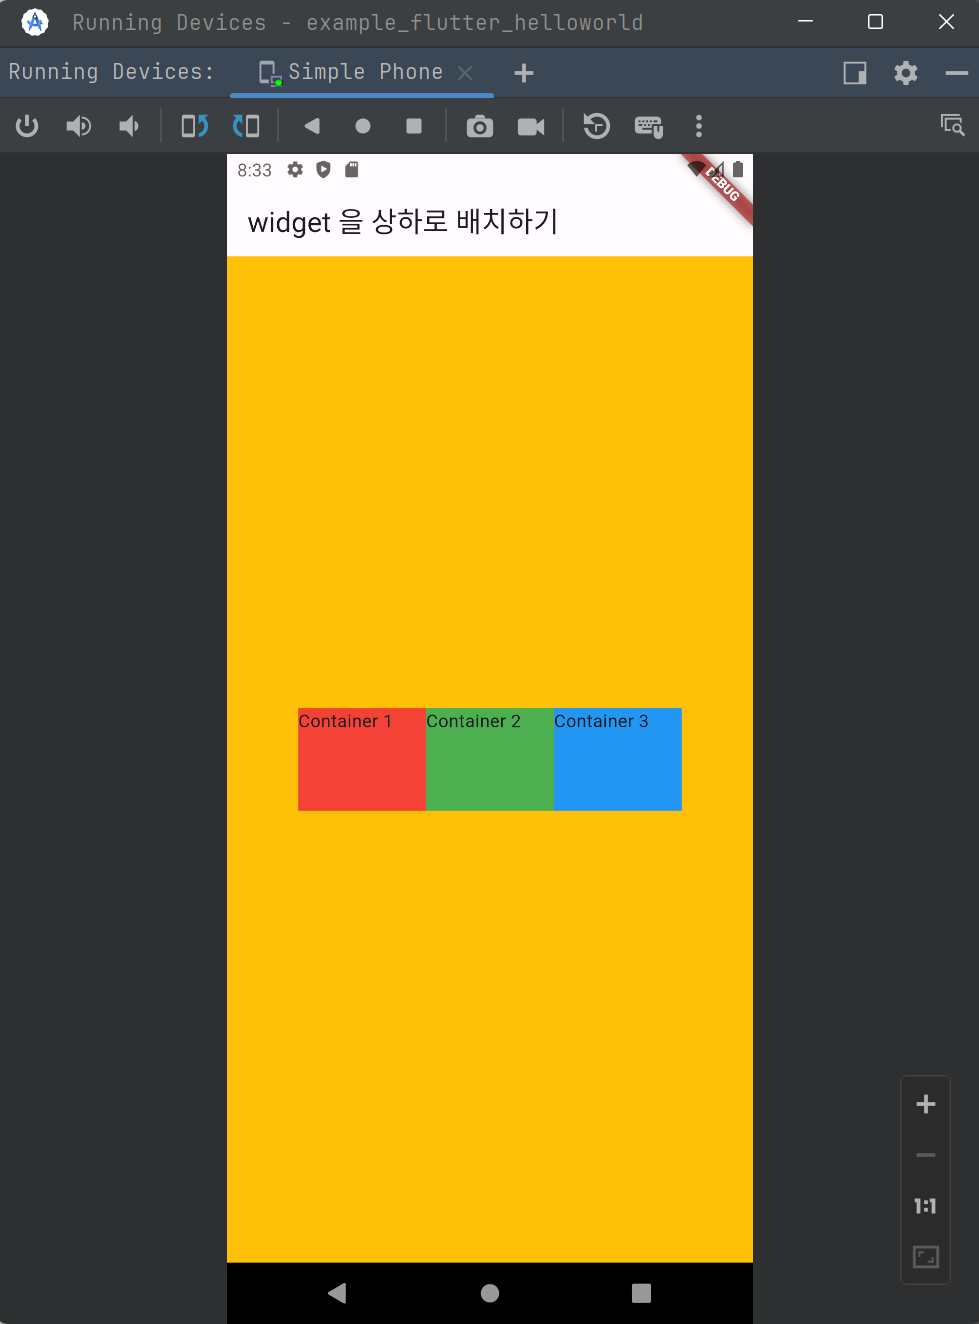
Row 를 세로 정중앙에 배치
Row 를 가운데에 위치시키기 위해서는 Container 로 감싼 후에 Container 의 height : double.infinity 로 주면 됩니다. Row 는 자기 자신이 위치한 곳의 정중앙에 위치하려고 하는 속성이 있기 때문입니다.
import 'package:flutter/material.dart';

void main() {
  runApp(MaterialApp(
    home: Scaffold(
        appBar: AppBar(
          title: Text('widget 을 상하로 배치하기'),
        ),
        body: Body()),
  ));
}

class Body extends StatelessWidget {
  const Body({super.key});

  @override
  Widget build(BuildContext context) {
    // 위젯을 위/아래로 쌓을 때는 Column 이라는 위젯을 사용
    return Container(
      height: double.infinity,
      color: Colors.amber,
      child: Row(
        mainAxisAlignment: MainAxisAlignment.center,
        crossAxisAlignment: CrossAxisAlignment.center,
        children: [
          Container(
            width: 100,
            height: 80,
            child: Text('Container 1'),
            color: Colors.red,
          ),
          Container(
            width: 100,
            height: 80,
            child: Text('Container 2'),
            color: Colors.green,
          ),
          Container(
            width: 100,
            height: 80,
            child: Text('Container 3'),
            color: Colors.blue,
          ),
        ],
      ),
    );
  }
}
9:21 이후 스킵. 더 들어봐야 특이할 내용이 없어서 스킵